Written by Professor Suzanne Barnes

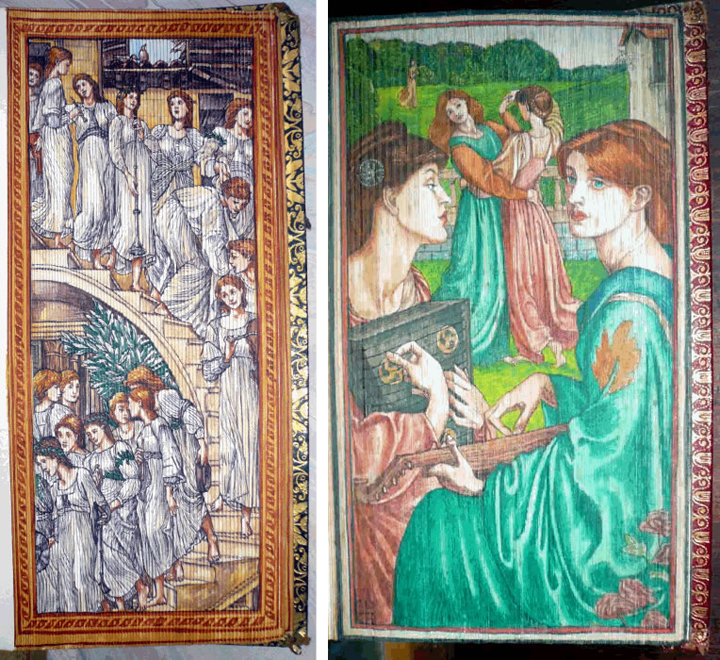
Birds, Martin Frost, 2010
The text block edge that lies opposite to the book’s spine, visible when the book is closed, is called the fore-edge. Illustrated fore-edges have been traced back as far as the 10c, when symbols, crests, and coats of arms designated ownership. By the 18c, fore-edge treatment had become more illustrative, often showing scenes or subjects taken from the book’s content. Sometimes these images are visible when the book is closed, and sometimes they ‘disappear’, becoming visible only when the pages of the book are fanned.
Illustrating a book’s fore-edges with original imagery is labor intensive, and renders any book in an edition one of a kind. Consequently, books so treated are costly and relatively rare. Historical examples can be found in the rare book collection at the Boston Public Library .
There are also a handful of contemporary artists who practice this technique.
Martin Frost is a book artist working in the UK who specializes in disappearing painted fore-edges. Martin creates single fore-edge paintings (scene becomes visible when pages are fanned in one direction), double fore-edge paintings (two scenes, one visible with pages fanned forward, the other with pages fanned back), and even triple fore-edge paintings (a third scene, visible when the book is closed normally).

Million Years, Martin Frost, 2010
Martin also creates beautiful wooden presses that can be used for illustration and/or display of painted fore-edges in the fanned position.
Permission to reproduce copyrighted images and fore-edge press generously granted by Martin Frost.
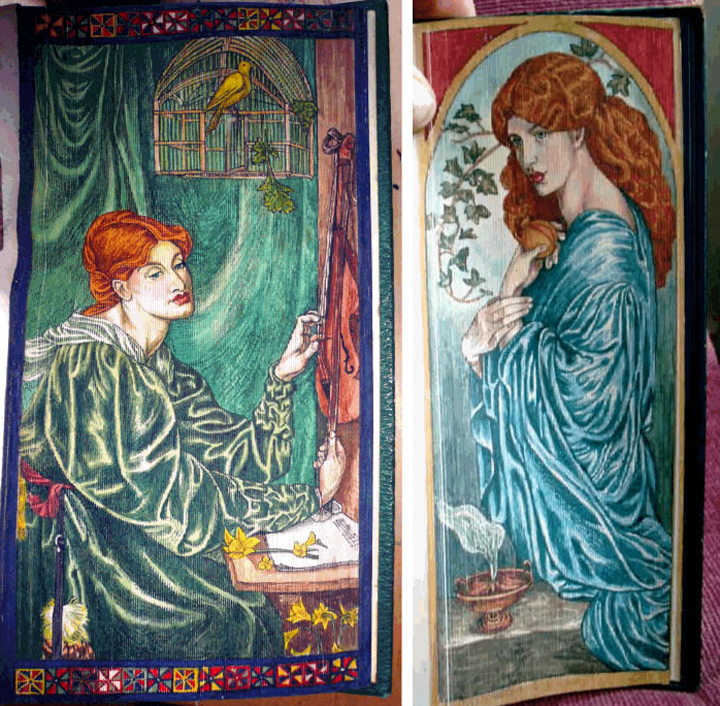
Clare Brooksbank also from the UK, illustrates fore-edges of antiquarian books with intricate and densely detailed classical scenes, often with a focus on women. Clare’s images meet the challenge of the elongated fore-edge rectangle in beautiful ways, particularly when the pictorial orientation is vertical.
Permission to reproduce copyrighted images generously granted by Clare Brooksbank
If you make artist books, or just want to try illustrating fore-edges of books in your own collection, the techniques are not difficult. Follow our How To after the jump.
1. Press fore-edges
You will need a sturdy board that can accommodate the dimensions of your book opened, with pages fanned, plus a narrower board or long block to clamp the pages firmly in place from above. C clamps large enough to accommodate the thickness of both pressing boards and text block work well.
Do not press the spine of the book beneath the upper pressing board/block. Only the text block should be pressed, immediately behind, but not covering the fanned fore-edges. Before clamping, place a sheet of wax paper between the last page and the back cover, to protect cover and end sheet edges from pigment.
2. Media Application
Watercolor is the traditional medium. Thicker pigments like oil or acrylic can cause pages to stick together and crack when the book is handled. Apply color with as a dry a brush as you can manage, to prevent feathering and bleeding. Hold the brush at a right angle to the page edges, to keep pigment on the surfaces, and to avoid backing it up between pages.
Soft colored pencils are also a good medium. Make strokes that follow the outward direction of the fanned pages, and avoid backstroking between them.
3. Finishing
If you want your fore-edge image to ‘disappear’, gilding and marbling will mask the painting until the pages are fanned. Both gilding and marbling are done with the text block closed normally and tightly clamped. Wrap the text block in wax paper with fore-edge exposed before clamping, to protect it from pigment.
Gilding involves brushing on a base film of red clay or chalk mixed with water, followed by application of a layer of gold leaf to the damp surface. When dry, the excess leaf is brushed off. Gilding kits are available at a reasonable price.
You can also marble your fore-edge by touching the clamped text block quickly to the surface of a shallow tray of water that has been spattered/treated/decorated with oil based pigment. A beautiful Asian version of this technique, called suminigashi, uses sumi ink and drops of sumifactant to separate ink from water.
Permission to reproduce copyrighted images generously granted by Clare Brooksbank and Martin Frost.


