
Written by Visiting Lecturer Ric Allendorf
 “Inking is meditation in liquid form.” – J.H. Everett
Snow is piling-up crisp and white, like paper. Another semester returns and I’m swept in the anticipation of teaching two more sections of Media Techniques; a course that creates the perfect environment for students to connect with new materials and movement, deconstruct their discomforts and habits, then liberate a steadier and more distinct voice of expression.
Muscles move the medium; medium moves the message.
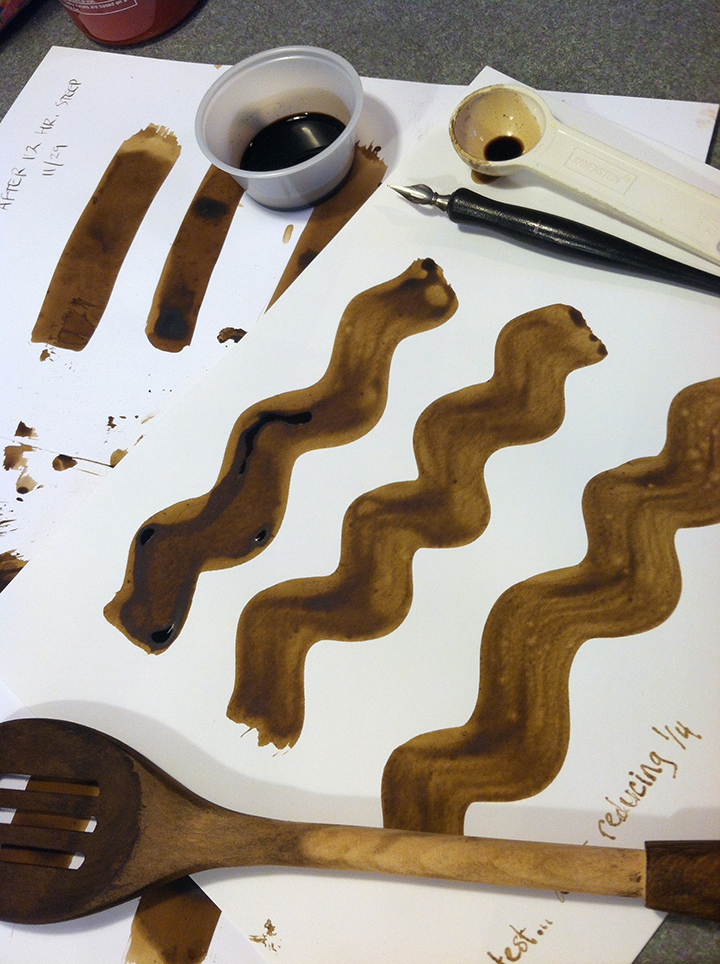
To prepare for classes, I often begin with a forensic-level of curiosity about the materials. The more that is known about ingredients and properties of a given medium, the more we can encourage known behaviors – or introduce a catalyst to resist, distort, or deviate from the expected flow.
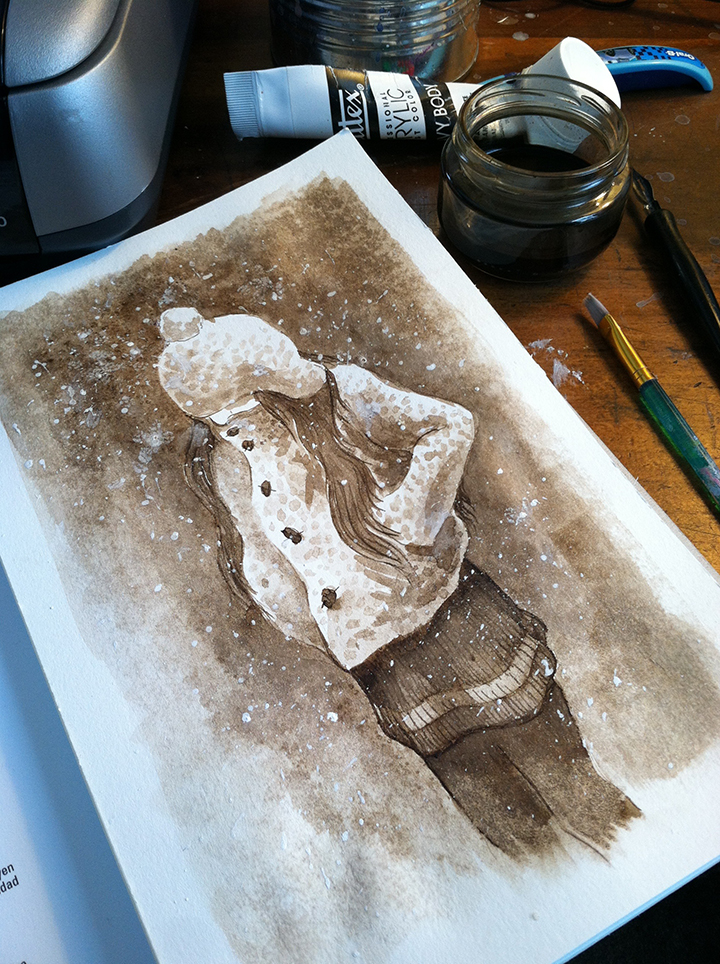
These discoveries find their way back to the class either in the form of a demo, an exercise prompt, or as actual supplies that I’m anxious to share. In recent years, students and some faculty have been on the receiving end of my obsession with homemade black walnut ink.
Continue reading to learn more about black walnut ink.
 “The very ink with which history is written is merely fluid prejudice.” – Mark Twain
Black walnuts, whose Latin name Juglans regia means ‘the royal acorn of Jupiter’, have an ancient history of cultivation and mythological significance. The oldest discovered walnut shell remains were found in the Proto-Neolithic Shanidar caves of Northern Iraq, the Mesolithic dunghills in Switzerland, and in Neolithic sites across France.
Greek and Roman writings tell of extensive applications for walnuts, covering all aspects of life and health; medicinal and curative extracts, digestive aids, astringents, anti-inflammatories, and even anti-parasitics due to the high amount of naturally- occurring tannins. These same compounds combine and ferment with iron sulfates to produce a durable, richly-pigmented ink ranging from a brown to a deep black when exposed to oxygen.
While there is no traceable recorded history of black walnut use in native North American tribes, archeological finds suggest the cultivation of black walnut trees for a few thousand years for use as a food source, medicine, and dye extractions. Ink makers sometimes claim walnut ink as one of the ‘historical inks’, maybe because the process conjures up images of native peoples or founding fathers with flying feather quills. But lacking a specific source or historic recipe, I can only offer that: a) black walnuts were plentiful in this country at the time of the early colonies, b) walnuts were well-integrated in the cooking and lives of native tribes and European settlers, and c) existing knowledge of nut extractions for stains, dyes, and oils was prevalent for centuries. This raises the likelihood that black walnuts provided a convenient substitution for oak galls in ‘common’ inks.
 “Let us cook. Isn’t that what this whole thing is about?” – Walter White
Why make your own walnut ink? First, it’s cheap! Find a large tree near a defeated man holding a rake, and you’ll probably find hundreds of black walnuts on the ground that he’ll be more than grateful for you to remove. For me, it also means deepening the connection with my materials and the ancestral vein of earlier artists. I also subscribe to the idea that my work could be imprinted with something harmonious to the natural world that vibrates just outside my door, and I can capture this in small corked bottles.
A brief disclaimer before the cook. Recipes that claim some historical origin often use vinegar and salt , which can be highly corrosive to your tools. So I would recommend avoiding them. Also, there is a ‘cold steep’ method that ferments for a few months, but this is the quicker cooked method.
BLACK WALNUT INK RECIPE (basic approach)
This recipe yields approximately 45oz. (The 10-cup mark on a 12-cup coffee carafe.)
Supplies:
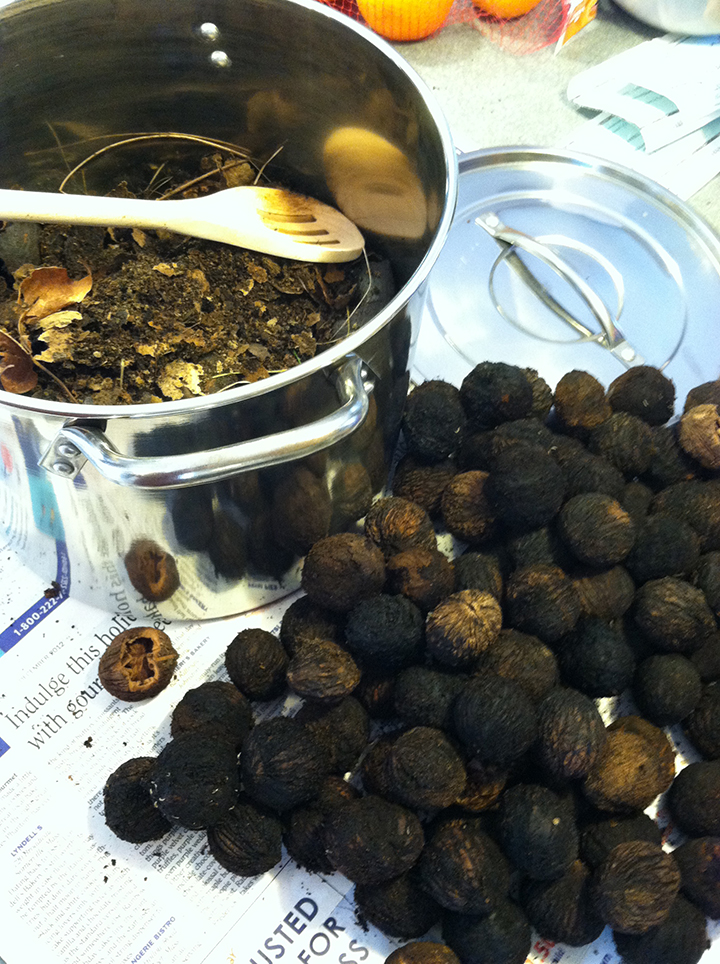
- A shopping bag full of black walnuts (40-60) with the hulls in place. Preferably dark, but can be dry or pasty wet. You can use the green hulls for a lighter ink, but they are more difficult to de-husk.
- A non-reactive stock pot – to be used only for this purpose.
- A few pairs of strong household cleaning gloves (walnuts are highly staining)
- A wooden stirring rod or spoon – to be used only for this purpose.
- Fine-meshed cheesecloth, t-shirts, or nylons for straining
- Gum arabic (available as a powder)
- A gallon of clean filtered water (distilled, rain, or well)
- Clove oil (Italian import shops, or baking suppliers)
- Wearing your gloves, carefully deconstruct the hulls from the hard inner shell. You might also take the time to compassionately pick out any worms. Let the hulls fall into the stock pot and discard the shells (note: because of a toxic chemical in the shells called juglone, these should not be composted for your garden!) Break up the hull particles as small as possible.
- Fully submerge the hull material with clean water and place the pot on your stovetop, bringing the liquid to a boil. You should be aware that this will fill your house with strong odor resembling something between oatmeal and a musty barn of goats.
- Turn down the heat and simmer on low for 2-4 hours, stirring occasionally and replenishing water as needed to keep the hulls covered.
- Turn heat completely off, cover pot, and let this sit for the day (or overnight)
- Strain the mulch liquid through your nylon or fine-mesh cloth into a large stable container. Wearing your gloves again, twist and squeeze the hulls to extract as much tea as you can. You may also place the twisted mesh on a cookie sheet and press with a weight.
- Return this liquid to your clean stockpot. Mark the height of the liquid. Then, simmer again until you have reduced it by about half. This will not only thicken, but darken the concentration into a glossy obsidian. Look for the ink clinging to the walls of the pot, much like red wine on the inside of a glass.
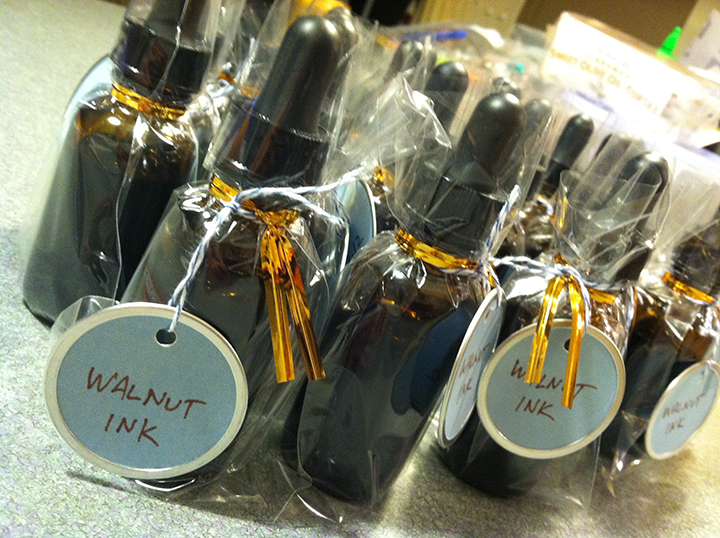
- Let the ink cool, then transfer to a master storage bottle or jar. (amber, if possible)
- Reconstitute 2 ounces of gum arabic powder with hot water and stir into the ink.The rule is to start with about 5% of the total volume. Gum arabic will give the ink ‘walls’ of surface tension, increasing flow and viscosity. Test and increase as desired.
- Finally, it is possible this mixture will grow mold. This is OK. The mold actually encourages tannic acids to convert to gallic acids, which deepen color and permanence. If it bothers you, just scoop it or strain it and rebottle. Some recipes recommend adding alcohols, but this will change the natural properties. I prefer using about 8-10 drops of clove oil, which contains eugenol – a strong preservative. Just float this on the surface. You can even add a single clove to each dropper bottle that you dispense while murmuring a mystical incantation in a forgotten language.
Please feel welcome to drop me a message at rmallendorf@massart.edu if you create your own inks. I’d love to see what you create with this medium. Also, be sure to follow and contribute to the multitude of artists posting ink work under the hastags #inktober (created by artist Jeff Peckar), #penuary, and #nibvember!
Thanks for reading!