- Use a “normal” focal length lens, 40-60mm is ideal for most cameras.
- Use an aperture small enough to keep the objects fully in focus (rather than a very large aperture that will create a minimal depth of field and throw certain planes out of focus).
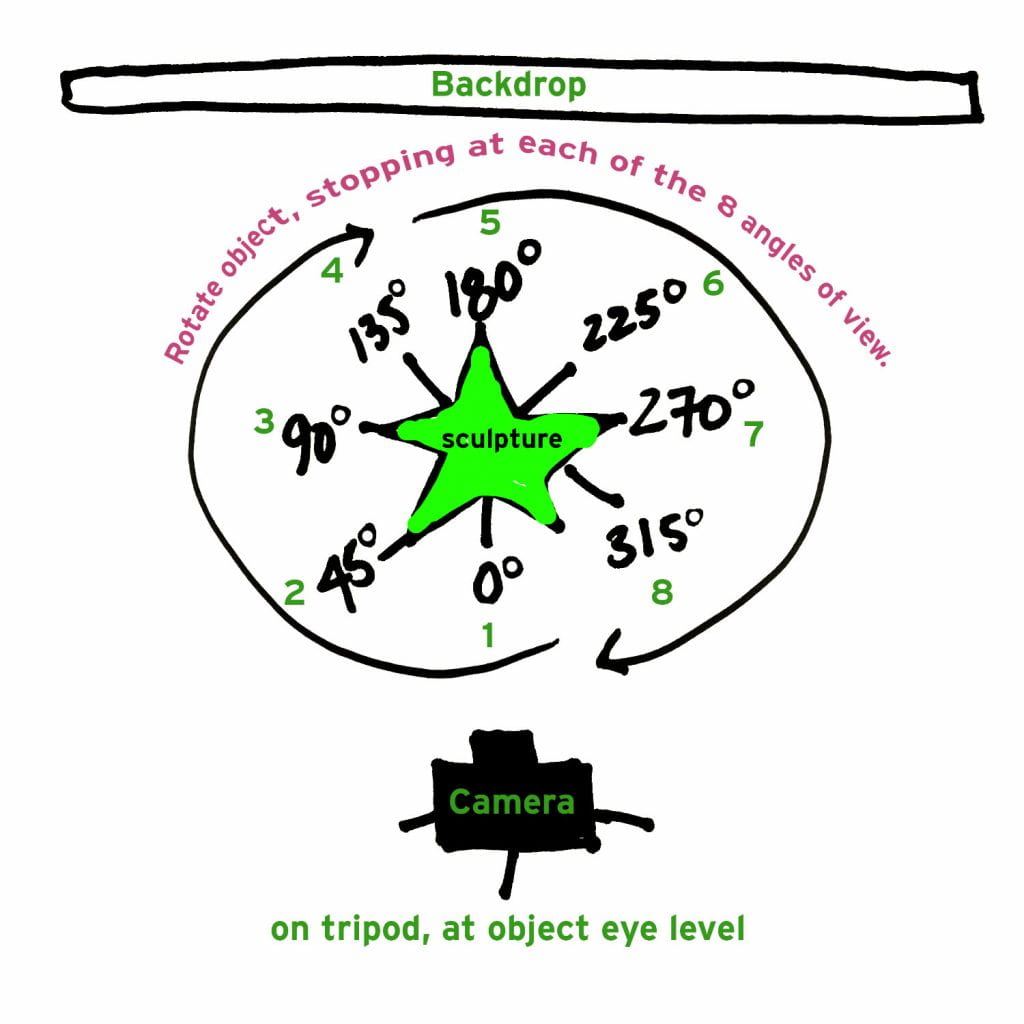
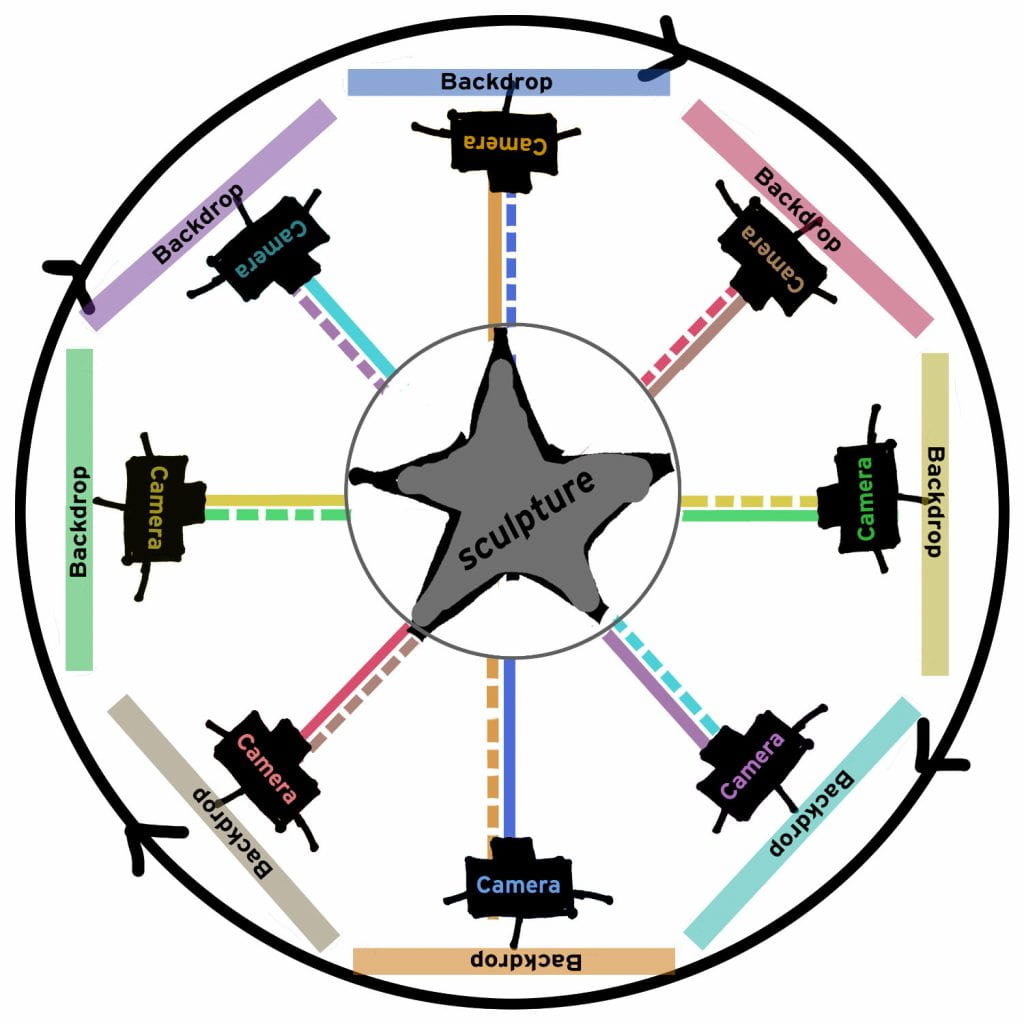
- Set up the object in a space where either 1.) the piece can be rotated 360 degrees maintaining its distance to your static camera, such as on a pedestal or tabletop (for smaller, sturdy objects – see first image) , or 2.) you can move 360 degrees around the object, keeping the same distance from it as you photograph it in the round (for larger objects – see second image)
- Use diffuse, even lighting, with minimal shadows. Ideal conditions include a fully shaded outdoor area or a room with fairly even lighting. The latter works well if you are rotating the object itself. If you are moving around the object, you want to make sure that it’s lit evenly on all sides. Artificial lighting, such as an on-camera flash attachment bounced off the ceiling, works well too.
- Shoot at eye level to the object. In most cases, even small items that will sit on the floor represent better when photographed this way.
- You do not need to “green screen” your object completely (though if you can, great!) but bear in mind that the object will need to be digitally selected off of its background in post-production (which the grad office can do for you). Therefore, use a simple backdrop, ideally a blank wall or sheet that is different in color/value from the object itself. If you are moving around the object rather than rotating it on a pedestal (second image), you can work with a partner who can hold up a backdrop behind the object, moving with you as you circle the object.
- 8 separate angles work well to create a 2.5D representation of your object. Determine which angle will be the “main” angle and then shoot it at 45, 90, 135, 180, 225, 270, and 315 degrees. See diagram below.
- It is advisable to use a tripod. Each angle should be shot at the same height and at the same distance from the object.
1.) Guidelines for smaller, sturdy objects that can be rotated (on a pedestal or tabletop):
2.) Guidelines for larger objects:

I appreciate the information but since Rebecca offered to shoot my 3D work and she is familiar with it, I’d rather put this stage into the hands of someone who knows what to do, how to do it, and knows related expectations. I don’t want this to be a ‘shoot from the hip’ thing. Thanks Rebecca if you are involved with this blog. Your help is much appreciated!!
Hi Darryl. Yes, I’m involved with the blog! 🙂 These instructions are simply being provided to assist people who plan to do their own photo documentation. They are courtesy and by no means a requirement. And thanks! Why don’t you reach out to me next week about getting a date onto the calendar for on-campus documentation!
I stumbled upon it I may revisit once again since I saved as a favorite it. I do believe this is an excellent website. mymilestonecard com
The challenges in Doodle Jump are always changing, and in order to continue playing, you will need to be quick and accurate with your controls.